Showing posts with label Personal Projects. Show all posts

Friday, September 16, 2011

Friday Feeling #2

Image is from here.
That's true, Friday is here once again and this week feels as though it has gone so so fast. This week I have Friday off work (I did work last night though!!) so I am going to have a day where I clean and tidy the flat in order for my lovely friends Heather and Josh to come around for a Wii Night. Heather is bringing the treats, which I am rather excited about... I don't even know what the treats are!!

Image is from here.
 So I think the evening is going to be filled with Mario Kart Wii tournaments and various games from Wii Sports... I can't really remember what games I have but I definitely have a few more and these two will definitely be entertaining!!

Image is from here.
I will also be going to work in York, which means a train and bus journey for me on both Saturday and Sunday, but I like train journeys!! I have plenty of books out from the library and I can read these and listen to some lovely music while travelling. I'm really enjoying work, who knew working in a clothing store could be so much fun. I also get to be a perfectionist without looking silly!
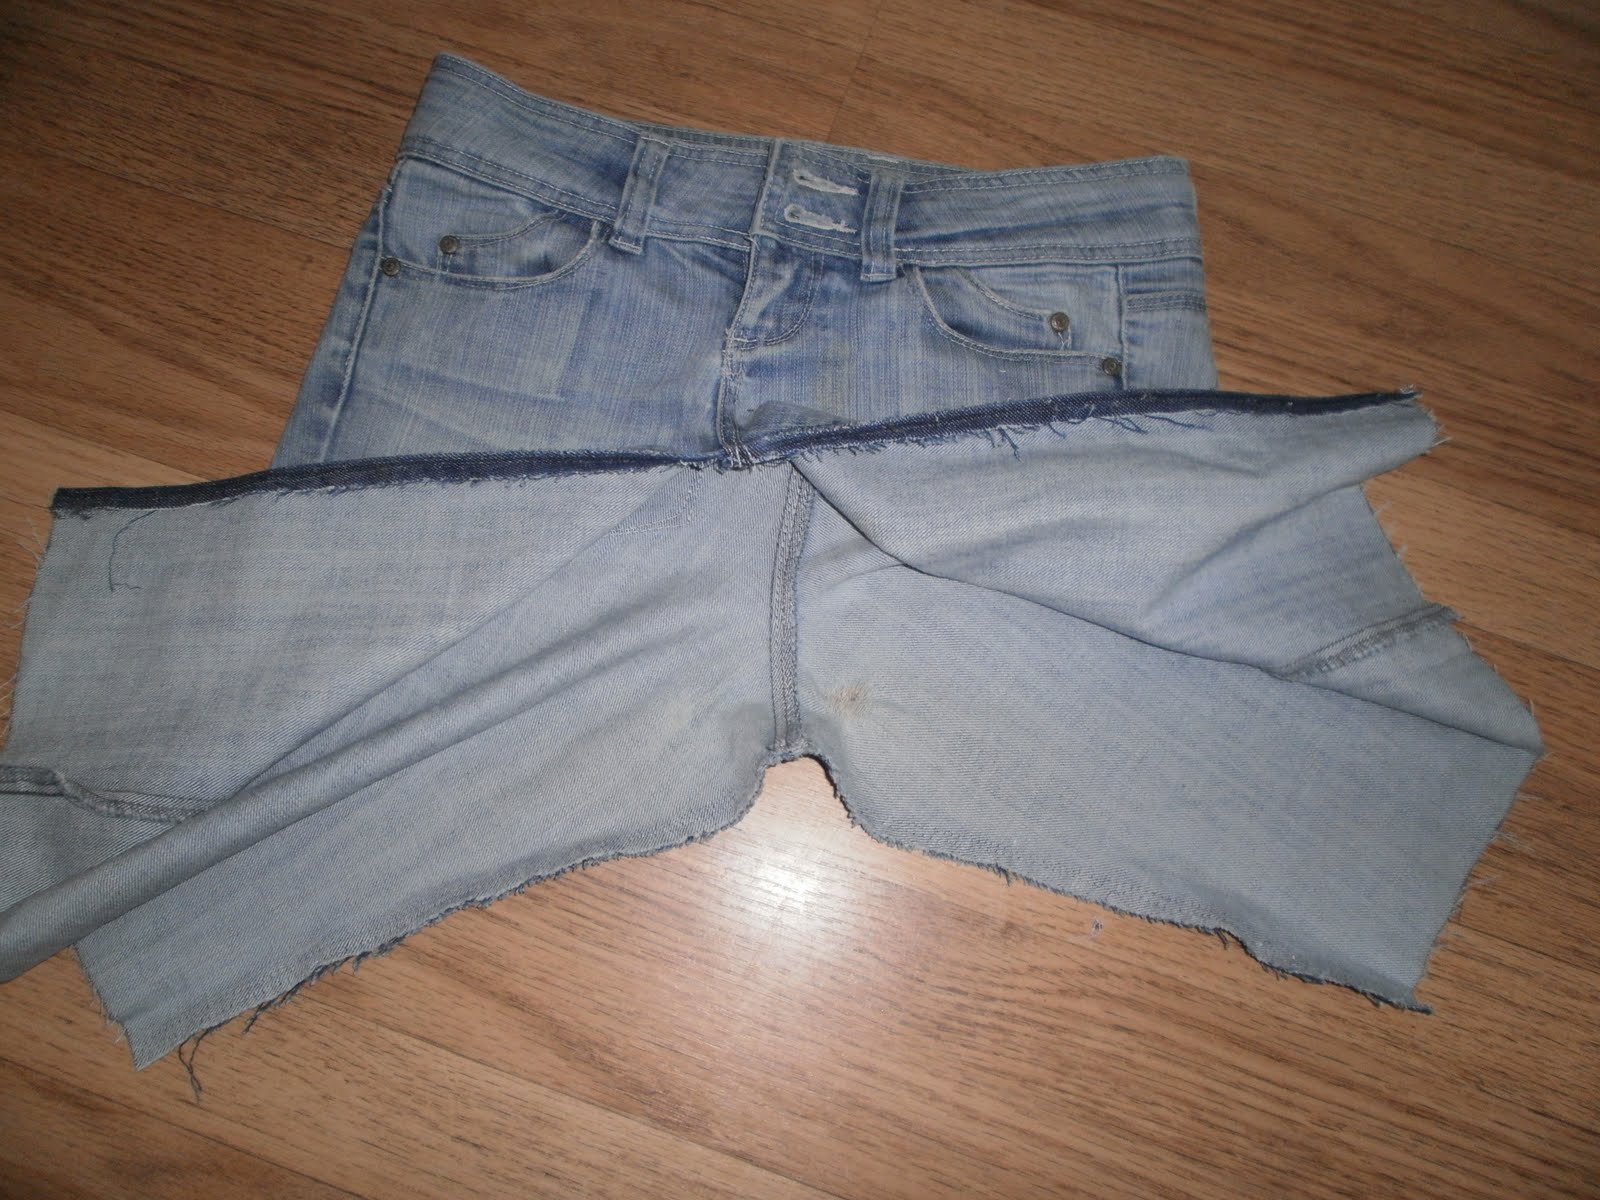
Image is from here.
  I also so badly want to do some sewing. I have some alterations to take care of for my friends but I am part way through making a bag, and I want a big sort out of all my fabrics at some point!! I plan to turn some of my storage shelves into my own little sewing storage where I can keep everything I own sewing-related organised and tidy! This might have to wait until I rearrange the flat though!!

This is my sewing desk, which will only get better as the year goes on!!
 So that is my weekend, as planned this Friday morning.

What have you got planned for the weekend?

Saturday, September 10, 2011

National Sewing Month

Image is from here.
Ooooh how exciting!

September is National Sewing Month!!!

Some lovely sewing facts!
Every year there is a theme and this month's theme is "Sew for the Love of it!", which I think is great for the first time I will be taking part in my very own National Sewing Month! Not that I really need an excuse to sew, but it is all about home sewing and the things you love to make.

 
If you head on over to http://www.nationalsewingmonth.org/ you can find out all about it, and they even have a **Competition** for all you lovely lucky people in the US! And even though I can't enter because I am in the UK, I will still make something featuring the "love heart" just because I sew for the love of it!

What are you doing to take part in National Sewing Month? What are the kinds of things you love to sew?


Friday, August 26, 2011

The "Other" Blog


Well, I always thought of myself as a one-blog kinda girl. I absolutely LOVE writing my blog, and I am really getting into it lately. I don't know what it is about it, but there is really something therapeutic about keeping this little online journal.

I kinda wish I'd started blogging earlier in my life, or that I'd got more into it in October 2009 when I first started this as part of a uni project. I feel as though Creative Ingenuity is becoming a little part of me, I think about it while I'm doing other things and think to myself, would I like to mention this on my blog? With this in mind, I have started to say yes to this question more and more over the past few months!

Anyway, over the past year I have really developed a love for baking, which I believe is from working in an office where "cakes and treats" were available most days of the week. I wish I'd baked more for the office over the year, but I'm gona visit them with homemade treats over the next year (it'll give me a break from uni work!).
Whenever I make a cake/cakes, I always follow a recipe. I mainly get the recipe off the internet, adjust it slightly to suit me then make my yummy treats. Then I put the recipe somewhere and move on to the next recipe. I never ever remember where I put the recipe and spend more time looking for it again as opposed to the actual baking!! I decided that I needed a recipe book of some sort, or a file/folder to keep the recipes I use in one place... then I thought I would like to share the recipes with people, and I'd like to give my reviews or to hear other people's comments, so I have made myself a Cakey blog. Now I have even more motivation to bake and make cakes, as I have my other little blog to write on.
So please feel free to visit my other blog! It only has one recipe on at the minute but I can PROMISE you that more will be uploaded very soon. I'd love for feedback and comments about the recipes and cakes seen on the website!


Click on the image above to visit *cupcakes and sweet dreams*....


Top image is from We Heart It, *cupcakes and sweet dreams logo is designed by myself.

Monday, August 01, 2011

Future Fundraising!

I have just done something that I have been planning to do for a while.... I have just registered for the Jane Tomlinson 10k in Leeds!!! It's a long way away, so I'm really quite optimistic about it but I actually feel quite excited. I now have something to work towards when I go running! I know quite a few people who have taken part in an event much like this, including my brother and cousin, however this will be my very first 10k event.


I have chosen to run for the charity Macmillan Cancer Support, which is one of the race's partner charities. Over the next year(ish) I will train, start collecting donations and I will prepare myself for probably one of the most rewarding tasks in my life so far!

Does anyone who has completed a 10k run for charity, have any advice for me?
I'd love to hear about your experiences!
Also if anyone else has registered or is planning to for the Leeds event then let me know!

Image is the logo of Macmillan Cancer Support, taken from their website.

Saturday, July 30, 2011

My Tailor's Dummy

When i left work on Friday, my leaving present included a menswear tailor's dummy. I absolutely love it and can't wait to use it in my final year! At university there are stands for us to use however it'll be great for me to have one to use at home too.
It's got a metal stand and a black body cover, so it's looking pretty stylish. Especially in Nathan's superman costume so far that I made him that you can see in the photo below.
This gift will allow me to adjust patterns, fit toiles and garments and to display the finished product. It will also hopefully encourage me to start more personal projects.


Image from my phone (sorry for the poor quality!)

Tuesday, June 21, 2011

Check this out...


I've just made a Welcome Page for Creative Ingenuity's Facebook Page! Why not have a look at it?

I wanted to make it interesting and yet give enough information about the blog to make people want to follow!

Monday, June 20, 2011

Changes...

A few of you might have seen that I've made a few changes to my blog lately. I've been adding new things in between my posts, such as my projects and CV pages at the top!
Today I decided to completely change the look of my blog. Although I loved the pink, I wanted something a bit fresher looking, so decided to opt for a clean white background behind my text. I used the Blogger Template to create my new-look page and I'm really impressed with the final outcome.
Why not have a look around and let me know what you think?

Tuesday, May 31, 2011

Superhero Costumes - Part 3

After making the specifications I could then begin to draw up the pattern for the Superman t-shirt. This is something I have learned to do since working for Cohen and Wilks and I think it will be really useful for my final year at university.


 Once I knew how wide the top would be then I made a small pattern for the Superman logo to be appliqued to the front. This was done by cutting out the outline shape in 3 layers of fabric - 2 yellow (to stop showthrough of the blue) and one layer of red. I then cut out the red part to give the logo and pinned this in place onto the yellow fabrics. I used a zig-zag stitch to completely secure the "S" in place.


I really love the effect of this as it looks smooth, and neat and I know there is no chance the fabric could fray or spoil. If I was to do this again however I would use an interlining just to stiffen the red fabric as little, as I found it did move as I stitched it.
 
I then placed the logo onto the front of the fabric and stitched this into place. Next I stitched the front and back together at the side seams and shoulder seams.


My next steps to complete this part of the costume is to finish the seam allowances, stitch in the sleeves, stitch the hem, cuffs and collar. and this part will be complete. I will put up a photo of Nathan wearing it once it has been completed.

All photos are from my camera.

Saturday, May 28, 2011

Upcycling - Turning Jeans into a Skirt

Over Easter, I had a few days off from work, and during this time I decided to do a big Spring Clean. This involved everything (except my boyfriends things of course) from clothes to collected clutter. I then went through all my clothes to decide which fabrics I wanted to use, to those things that were suitable to give to charity. I found I had a pair of Topshop jeans that weren't too battered and beaten to be chucked away, and that were a nice denim that it could be useful to use in design journals next year.

Then I thought about Upcycling these jeans into a denim skirt - it is summer after all! So here is how I did it:


 I took the jeans pictured above, and I cut them at the knees (as in the picture below), much longer than I anticipated the skirt to be, so that I could choose the desired length later, and leave enough extra on the hem the skirt.


I then opened the Inside Leg seams to open the jeans into a skirt. The Front Rise was unpicked to the bottom of the zip fastening and the back rise was unpicked up to halfway of the seam.


I then changed the way the back rise sat, eliminating the curve as much as possible to create a straight seam. I then added the extra top-stitching as in the original design of the jeans.


At this point, I cut the skirt to the desired length with added hem depth. I then pinned the front rise so that it overlapped under the zip and lay flat. I cut up part of one of the remaining legs to add an insert into the front where the inside legs now opened out. I then stitched this in place following the original design of the top-stitching.


To finish the skirt I hemmed it, and pressed it. The finished result can be seen below!


I would really recommend Upcycling your old clothes, maybe you find something boring now and would like to update it's style? It took me 2 and a half hours to change these jeans into a skirt, and it is definitely worth taking the time to do it.

Feel free to let me know what you've upcycled!

Images are from my own camera.

Friday, May 27, 2011

Superhero Costumes - Part 2

The next part of my superhero journey was fabrics - this always gets me more excited about a task as I can start to visualise it. I know I should have really made specifications first to minimise fabric waste, however I like having spare fabric left over afterwards.

So below is a photo of the fabrics for both costumes, I already think they look very superhero-esque!


I bought these fabric from Samuel Taylors in Leeds, you will find their website here.

Image is from my own camera.

Wednesday, May 25, 2011

Superhero Costumes - Part 1

Well, it's been a while since I have posted on here, but I'm about to start a little project in preparation for a night out to celebrate my boyfriends 21st birthday.

So the plan is, to go out on a pub crawl with a bunch of friends all dressed as different superheroes. As a fashion design student, who loves a challenge, I have decided to make our costumes. I will create specs, make patterns and sew, sew ,sew until my heart is content.

Our choices for heroes are...
Superman

and...
Wonder Woman

It's all very exciting! I'm really looking forward to making our very own outfits, so I thought I'd document the little story on here and show you my journey along the way!

There will me more posts to follow soon!! I hope you enjoy.

The images are from google.co.uk

Tuesday, January 25, 2011

Inspired

When I got my new laptop, it has Photoshop Elements already installed on it. As an Illustrator fan, with some knowledge of Photoshop, I decided to play around with it and see what it could do. I had a photo of my boyfriend Nathan and decided to see if I could make an Andy Warhol inspired picture. The results are below:


Firstly I duplicated the original photo and arranged in the four quarters. I then draw 4 identical squares as the background of each quarter. Next I changed the style of the photo to an artistic style called "cutout". I coloured in the square backgrounds and I used the Smartbrush to change the faces to match the colours of each background.
I feel that this worked well and although not exactly like the Marylin Monroe portraits created by Warhol himself, I feel I've achieved a similar effect.

Image taken from my camera and edited by myself.

Sunday, January 23, 2011

Just a little something...

Well, it's been a while since I have written on here. I've been very busy over the past 6-7months doing my placement in QA at Cohen and Wilks. It has been an amazing experience so far and I am still learning so much from it. I have been working with Childrenswear, which is a new experience for me, and my role mainly consists of requesting tests on fabrics and components (so the garment will be safe) and measuring and checking garments for quality. I personally work with TU@Sainsbury's, Littlewoods, Dunnes and Peacocks as customers. Other customers Chen and Wilks supply to are M&S, Debenhams, Next, Mothercare, George, Tesco and John Lewis, as well as many others. I have worked and inspected garments for all these customers, which has shown me the differences in childrens clothing in the High Street. I have gained so much experience, more than I could imagine, since I started working there and I love my role as a QA, and although I don't get to make things, I am certainly considering working more in QA after university.
It'll be weird going back to university but I am looking forward to the work and projects I will be set in Final Year, even though it will be a HUGE amount of work. I've already started considering what I'll write about in my dissertation and what my designs and final collection could be based on. I think what I'm looking forward to most abotu going back to uni is the fact I'll be spending more time being creative again.
Well to end this post I thought I'd show you the suit jacket and trousers that I made for Nathan, which he wore to the Cohen and Wilks Staff Christmas Party.


Image taken from my camera. Thanks to Nathan Whitehouse for allowing me to use this photo of him.

Friday, April 23, 2010

Interview Technique

When I found out I had an interview with Cohen and Wilks in February, I wanted to do all I could in preparation for this. I didn't feel confident about my interview techniques, and I was feeling excited but also nervous. Cohen and Wilks is situated in Leeds and this was where I wanted to stay to complete my placement year, and many students have recommended the company from their past experience there.

In my design development module, we were advised that if we had time to produce an extra project for the company, showing how your skills can be related to them. This, to begin with sounded like a lot of work but I wanted to be remembered at this interview and this seemed the best way. I did a little bit of research into the company when I was applying for the placement, and found out they supply clothing to a number of high street stores. George at ASDA was one on the list and I decided to complete a childrenswear project for them, as I haven't got much experience in this sector of fashion.

I started by looking into George at ASDA as a company; their history, website and future products were just a few sections I wrote about. This was very interesting for me to look into and I felt more prepared for the interview just by doing this small amount of research.


Next I looked at their current products for girls and boys aged 4-12 years. This allowed me to see shapes, style, colour, print and fabrics and also enabled me to get a feel for the childrenswear sector so that I could analyse trends and predicted shapes to see how well they would work in a collection for George.


After this I researched childrenswear trends for Autumn/Winter 2010/2011 on WGSN and began to look at colours, shapes, moods and concepts of these trends. This was quite different to menswear and womenswear trends as they were less about the world around them but the experiences and lifestyles that you lose as an adult. The predicted shaped I looked into were coats and jackets, which incidentally is the area Cohen and Wilks provide the most garments in for chidrenswear.


Next was the creative part, and the most fun part for me, creating moods for both the boys and girls collections. The boys collection was called "Nostalgic Nature", which inspired the mood for my current Design Development project for Burton Menswear. And the girls collection was called "Favourite Fantasy". I then designed a page of jackets for each collection, and analysed them by hand after they were printed.


All this was completed on Illustrator, to show my skills in using this design package. As simple as this project looks, it was designed this way. Each decision in terms of layout, colour and font were all thought about carefully to display the right feel for the project and to provide clarity in my work.

I was told during my interview that this was a really good idea to do in preparation for the interview and is something I will probably aim to do as part of my research for future job interviews. It creates a good starting point for a conversation and also allows the company to see research and skills based purely on them. I would advise other designers to try this in their interviews, it will definitely make you stand out!

All images are of my own work; trend images are from wgsn.com; information about George and the current collections are from http://direct.asda.com/george/clothing/10,default,sc.html.

Wednesday, December 02, 2009

Homemade

This year, my boyfriend and I live in a flat in an old Gothic building. With period features including archways, large beautifully designed windows and high ceilings, it was hard not to fall in love with the place. After living here for a few weeks we found that because our bedroom window was quite big and the curtains provided were rather thin, quite a lot of light was let into our room sometimes making it difficult to sleep. The solution to this was to get new curtains.

New, thick curtains made to the size of our window, however, was looking to be quite expensive, which is something us students don't like. So an idea was born, why not make our own curtains? We ventured into Samuel Taylor's, a fabric shop in Leeds city centre, to see what fabrics we could use. We got a few metres of thick red cotton, to match some drapes over the bed; curtain blackout and some white cotton to line them. This is total came to £44, which was half the price of some of the curtains we'd seen (to be honest we bought too much fabric but it might come in handy in future!).

Over the next few evenings we began planning the final look of the curtains including how long they'd need to be and how we'd hang them on the rail. We cut out all the layers for each curtain, with seam and hem allowances and I got to work on my sewing machine. First i stitched the blackout to the lining to hold it in place, then I stitched the main red cotton to this, concealing all raw edges. A top edge was then added to the curtains, which is where some tabs are concealed so that the pole can be slotted through them and be hidden behind the curtain. This also meant that no light could come through above, below or around the curtains. It was a long process, mainly because I'm a perfectionist and wanted a professional finish, but it was really worth it! The curtains add a personal touch to our flat, making it feel even more homely than before.


Images from my camera
Related Posts with Thumbnails